Back
Your Email Setup information
is below.
Your Username and Password would have been provided to you in email or text. Please refer to the message for login information.
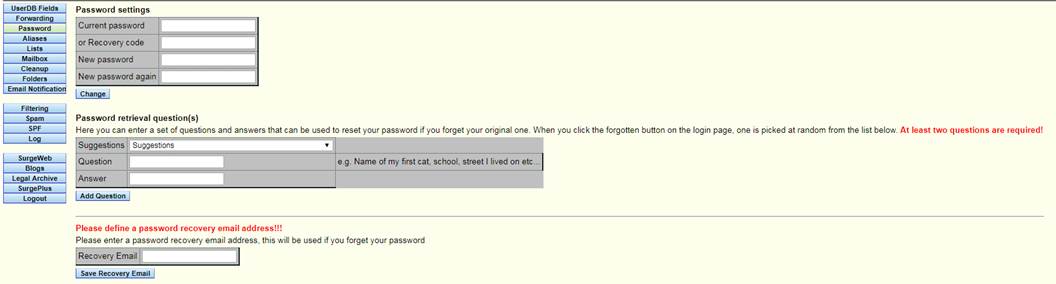
It is strongly recommended you change your password and set
up recovery options such as password retrieval questions.
To change your password go to:
https://smtp.yourowndomain.com:7443/cgi/user.cgi Once you are logged
in: Set a password retrieval question, click on
PASSWORD selection on the left panel.
You can read your email using our website at
https://webmail.oxwil.net
If you want to use another email application such as
Windows 10 Mail, Outlook, Android Mail, Apple Mail note the following below.
Incoming Mail
Imap address: imap.yourowndomain.com
Imap port: 993
Type: SSL
Full email address and password are required.
Outgoing Mail
SMTP address: smtp.yourowndomain.com
Imap port: 587
Type: TLS
Full email address and password are required.
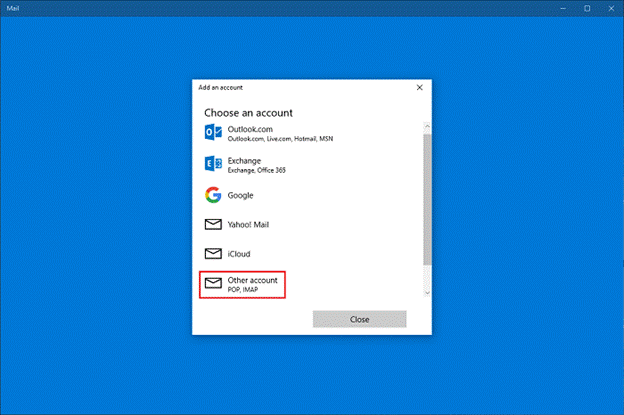
Follow this guide to set
up your email account in Windows
10 Mail with IMAP.
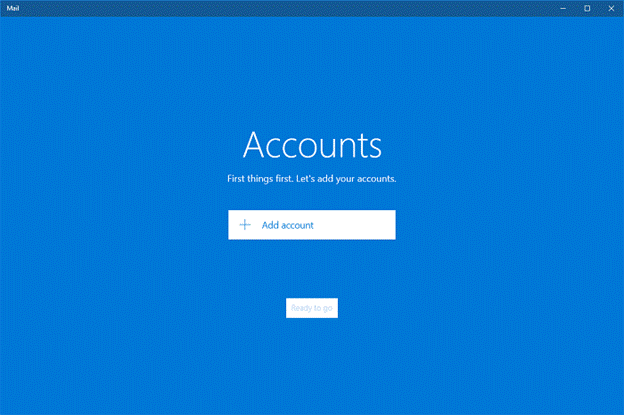
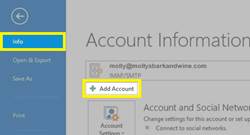
Note: If you have
previously set up an account in Windows 10 Mail, click Accounts in
the top left corner.
Click +
Add account on the right of your screen and continue at Step 3.
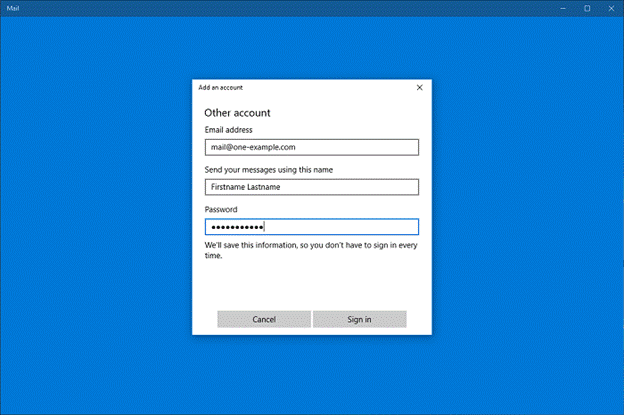
You need to enter the following
details:
·
The
complete email
address for the account you want to set up.
·
The name that
should be visible as sender.
·
The password for
this account, you also use it to sign in to Webmail.
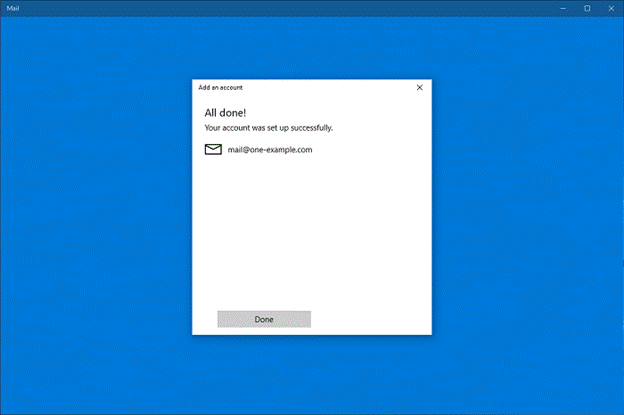
That's all, your account
is now set up. Click Done and
then Ready
to go to open your inbox.
Tip: Click Folders to
see the folders you created yourself. If you have a large account, it may take a
while until all folders and emails are synced.
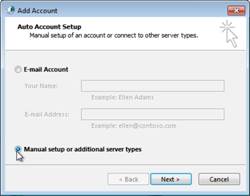
Note: These
instructions are only applicable to Outlook on a PC. Note some versions of
Outlook may be different

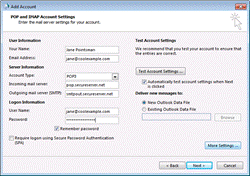
|
Field |
Enter |
|
Your Name |
What you want your display name to be for
this account |
|
Email Address |
Your full Workspace email address |
|
Account Type |
Select
IMAP, depending on your account. |
|
Incoming and Outgoing mail server |
Enter the server addresses displayed
in from above. |
|
User Name |
Your full Workspace email address |
|
Password |
Your Workspace email account password |
|
Remember password |
Select this option |
|
Require logon using Secure Password
Authentication |
Deselect this option |
|
Field |
What to do... |
|
My outgoing server (SMTP) requires
authentication |
Select this option |
|
Use same settings as my incoming mail
server |
Select this option |
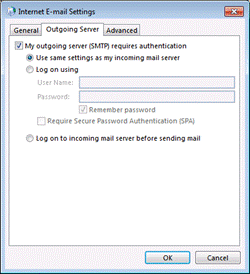
Note: As
a troubleshooting step, select Log
on using. Then enter your User
Name, and your Password.
Use your full Workspace email address as your User Name.
|
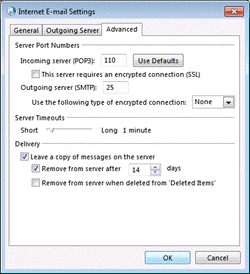
Field |
What to do... |
|
Incoming server |
Enter one of the incoming ports, listed
above |
|
This server requires an encrypted
connection (SSL) |
If the port is listed in black in your
Email Setup Center, deselect
this option. If it is
listed in orange, select
this option. |
|
Outgoing server (SMTP) |
Enter one of the outgoing ports, listed
above. |
|
Use the following type of encrypted
connection |
If the port is listed in black in your
Email Setup Center, set this to None. If
it is listed in orange, set this to SSL. |
|
Server Timeouts |
This selection is up to you. |
|
|
|
You now
should be able to open Outlook and send and receive your Workspace email. If you
are still having trouble, contact your system administrator.
We know
you're excited to get your email set up on your Android®. We should have your
email working on your device in about 5 minutes.
Use
these steps to set up the native mail app with your Workspace email account. You
can also use the Outlook app to get your email.
If you
follow the steps below, and you can't receive or send email, please see your
Android Support for help. You might need to make some additional changes
depending on where you live and which ISPs you use
BEFORE
YOU START: To
set up Android with your email, you need to know your POP or IMAP Email Server
Settings and ports. To find them, go to the information above and write down the
information that displays under Email Server Settings.
Note: NOTE: The
steps to set up email on your Android device might be a little different
depending on your make/model and your network provider. However, all the
information you need to set up your account (username, password, server
settings) is in these steps.
|
IMAP |
|
|
Username |
Enter your full email address. |
|
Password |
Enter your email account password. |
|
IMAP server |
imap.yourowndomain.com |
|
Port |
993 |
|
SMTP (Outgoing Mail Server) |
|
|
SMTP server |
smtp.yourowndomain.com |
|
Port |
587 |
|
Security type |
tls |
That's
it. If everything is working OK, you should see some email messages. To make
sure you can send messages, go ahead and compose an email and send it to
yourself.
Note: Some
Android devices and mail clients do not require sign in. Therefore, if the
settings above are not working for you, please go back to step 7 and uncheck Require
sign-in, then proceed with setup.
If
you're not receiving email messages or you can't send messages, Please contact
our system administrator. Don't worry. There are a few things that can happen
during the setup process. We'll help you investigate and fix them.
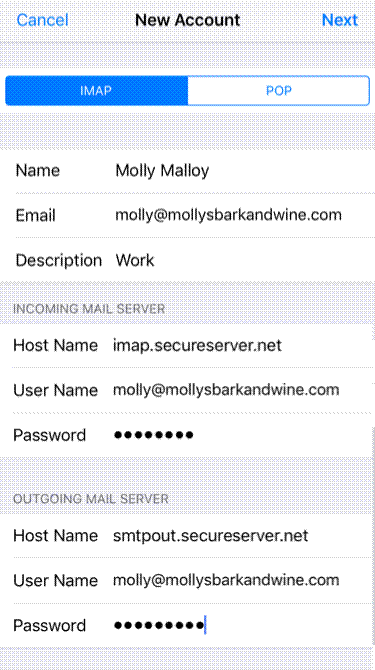
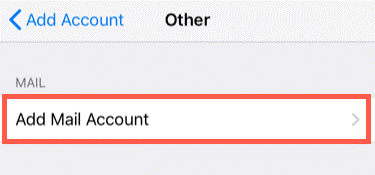
You can
set up and use Workspace Email on your Apple mobile devices, including iPhone or
iPad.
Before
you start, you need to know your IMAP Email Server Settings and ports.
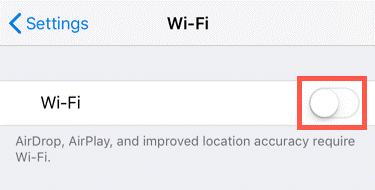
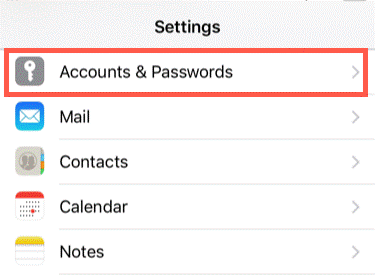
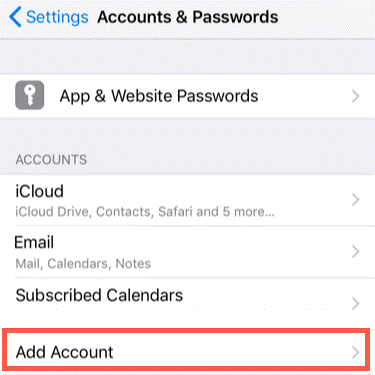
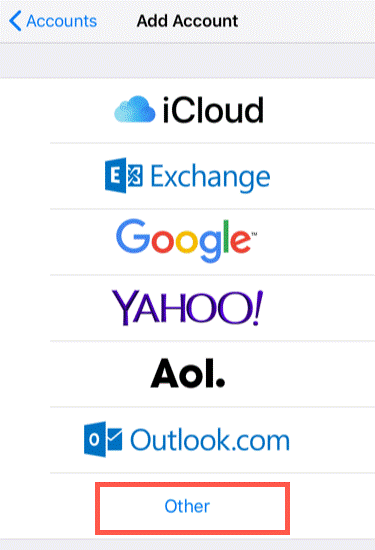
Tap Settings
![]() .
.
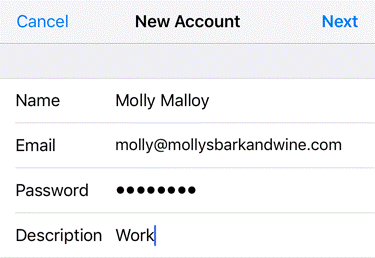
Note: Even
though iOS labels the Outgoing Mail Server fields as Optional, you must enter
them for your email to work correctly.